Saturday, April 21, 2012

Dot Couture quilt top finished

I took these photos on Monday before leaving for my business trip to Barcelona in hopes that I'd have time to post one day this week - even a brief one to show the progress on a quilt/sewing project.

This is my "Dot Couture" quilt - made from Urban Couture by Basic Grey using the "Dot Party" pattern that was published in Quilts and More (now available as individual pattern from Jaybird Quilts. Actually I think the pattern name in the magazine may be different. But I'm 99% sure the actual pattern is the same, but without options for other sizes figured out for you. 

I used a Kona Ash for the background fabric and one Layer Cake of the Urban Couture - pretty fast and easy if you use the circle ruler and tiny rotary cutter recommended. I'm sure I'll make good use of those tools again in the future.


This is a nice look - I am happy with the Ash background fabric.  I bought some Brown Basic Grunge fabric for the backing, and some green for the binding. 

Summer 2010 issues of Quilts and more in case anyone wants to look through their stash of magazines rather than paying again for a pattern.

I'm going to attempt to link up to Sarah's Whoop Whoop! party  and also at TGIFF hosted this week by The Peony Teacup!

Friday, April 13, 2012

oh, is it really Friday? okay, lemme show you my Honey Cowl

I haven't had much time to do anything crafty lately - and when I do it's back to 10-15 minutes here or there. Or portable knitting (and crochet as I shared last week!).

So, this week I finished my Honey Cowl.  I really like it. I like the whole "cowl movement" that seems to have happened. I love my scarves, but they seem to drift around on my and then next thing I know I'll have a long tail getting caught in the car door. Flapping in the wind. yup.

I think I showed this way long ago as a WIP - it has been an on again/off again project for me. Nice and portable, but lower priority than, say, learning to crochet to make Piggy slippers (big hit! yay!)


Super easy but interesting stitch - the pattern is called "Honey cowl" - I'm thinking because of the honeycomb look?  Anyway, it's available as a free download on Ravelry.com if you want to check it out.  This one is made of Rowan Cashsoft which has some amount of cashmere. It's a really neutral color and that's very unusual for me unless I'm knitting for Mr. Wonderful. But I'm loving it so far.


 Cody thinks it should be a cat cowl. But he is sadly mistaken.

Have a great weekiend!  I'm going to do some link-ups for this Friday evening post:

Whoop Whoop! with Sarah


TGIFF is over at Quilt Matters today


And if you want to see what I've been up to with the Health Activist Writer's Month Challenge - that's been pretty interesting with a different writing prompt each day. Haiku, letter to my 16 y/o self...all kinds of shenanigans!

Friday, April 6, 2012

This little piggy went to Market...

Actually, THIS little piggy has been to Tucson, Nutley NJ, and San Diego all in the space of 3 weeks. The last trip was a spring break family mini-vacation...but my point being that I haven't been at my sewing machine or craft space for over 3 weeks.  But fortunately, knitting is portable so I usually have something on the needles to work on.

I've also taken on a couple of writing challenges lately - one was to write in a Gratitude Journal every day during Lent. The other is that I'm participating in the Health Activist Writers Month Challenge over on my other blog.

My Friday Finish this week are these "Pudgy Piggy Slippers" (I'm playing with my camera settings and post-processing, so the colors are a bit different. I guess the bottom photo is more accurate, but I like the top photo.


Here is the story about these slippers. My super cute niece and god-daughter sent me a letter several weeks ago with one of those free patterns that you can pull off a tablet hanging in the yard aisles at Michaels.  For these slippers.  She "fell in love with them" and her mom told her that while she couldn't make the slippers, her Aunty Janet could. (!)

Only problem?  I don't know (or didn't know) how to crochet.  So I went back and reviewed some of the Crochet School lessons at CraftyMinx. Then I had to go to redheart.com to download a full size version of the pattern because my old eyes couldn't handle the teeny version from the craft store. The pattern is all done in SC (single crochet), so I thought I could tackle it.

And of course because it's my first crochet experience, I had to rip out the first slipper after the second one looked better and more correct...so it was actually a fairly "big" project. But I can single crochet like nobody's fool now - increases, decreases, circles...Next project needs to use some other stitches so I can learn those too.

Miss Thing's Birthday was Sunday, but we were out of town - and the slippers weren't finished yet. But I'll see her on Easter - I hope they fit! I hope I remember to take a photo with them on!  Here is the Red Heart photo she fell in love with.


Happy Friday - time for some Friday Finish link-ups:  Go check these out!


TGFF is over at Dreaming in Patchwork this week


Sunday, March 25, 2012

My new camera bag - big Whoop!

I got a DLSR months and months ago - and it's been sitting on a shelf in the original box except when I use it. Which hasn't been enough because I didn't have a bag I could throw it in to take along with me.

But now I do.

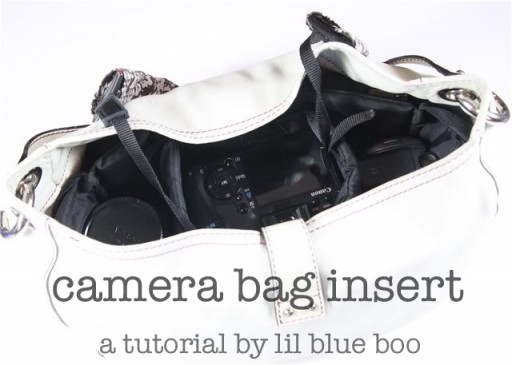
I got this idea from a tutorial I found online to turn a regular purse into a padded camera bag here on Lil Blue Boo.

So I kept my eyes open for a suitable purse on sale and found this one at Kohls a few weeks ago. I think I paid maybe $20? And it had an umbrella too (bonus!) - I like the bright yellow color.


You need a bag with an open inside (no dividers) and a squared (rectangular actually) bottom to fit an insert into and for stability.

I needed to modify the measurements in the tutorial, and didn't follow it to the letter, but it was pretty easy - and I had all the materials (besides the bag) already on hand:
 This denim repurposed from some IKEA curtains (I have a lot of this, so you've seen it before...and you'll probably see it again).  I also had cardboard, 1/2 inch foam, and spray adhesive on hand. I did buy some extra velcro but that was it.

I cut a bottom and four sides from both the cardboard and the foam.
Basically, if you've made a simple tote bag with a squared bottom, then you already know how to do much of this.  The only tricky part was that the math didn't seem to come out right for me first time I tried to change the measurements for the tutorial, so I used some empirical measuring to square the bottom on the second try.


After cutting 2 large rectangles of fabric to match your bag measurements, just stitch up the sides with right sides facing. 

Then square the corners - checking with the cardboard bottom piece to be sure the measurements look right.


Before sewing up the lining, add your velcro strips (I tried out the fusible ones and so far they seem sturdy).


The construction bits are not shown here - using the adhesive I found it was easier to stick the foam pieces to the corresponding cardboard and then insert the bottom first (with adhesive on the bottom of the cardboard too). Then I inserted the lining and fit the side foam panels in, tucking and futzing them around to be a snug fit.  The tutorial instructs a handsewn finish at the top - this may look nicer, but I was feeling too lazy to do that, so I folded and pinned, and then stitched on the machine - it was tricky with the cardboard and foam panels, but they are still flexible, so with care I managed it.


Then I made two inserts with only foam and with velcro on the end tabs to make 3 compartments in the bag that can be adjusted and moved as needed.

And Voila!  An attractive camera bag!

This bag won't suit every occasion - like it won't be particularly good for travel the way I do it, since I'd need a more multi-functional bag to carry other items too. But I can throw this in the trunk to take around with me, and I can fit my wallet and cell phone in there if I'm going to an event or something.

I would do some things differently if I make another one - there was a nice tutorial on Sew Mama Sew! awhile back that looked more flexible and very nice for example. But this bag makes me really happy for the moment. The inside and outside pockets are very handy for smaller things like memory cards and a lipstick. Handbag-like camera bags can be quite spendy, so making one for under $30 feels good.

It's already Sunday, but I was out of town on business all last week, so I'm linking up with Sara's Whoop Whoop! Linky party - it seems that the Master linky app was down due to technical issues and many link-ups seem to have been affected - so the party was extended!
It also looks like I missed the Hands2Help official signup too, but there's still time - I just need to figure out if I have the time this spring - it's another busy time! Go check out the Linky's and if you are a quilter, consider a charity quilt challenge - H2H or something else close to home.

Have a great week!

Friday, March 9, 2012

Happy Friday Finishes and WIPs

We needed a clock in the basement playroom/craft space, so when the Fat Quarterly Issue 8 came out recently with a paper pieced patchwork clock, I decided I'd try it...


But here's my confession - I had the templates printed out on my cutting table, and all the materials ready to go, but not the actual instructions. I still don't know what happened to them (I did print them out) - maybe they got left or dropped at the craft store.  So I used the template to paper piece an applique of the pattern rather than a true patchwork.  I'm pretty stoked with how it turned out! I used all scraps - even some of the teeny patchwork scraps left over from my "Circular Logic" pillow (also a Fat Quarterly project that I submitted for the reader's competition last year).  So if I remember, I should link up to one of the scrap attack linky's I've spotted too.  But for sure it's a Whoop Whoop!


At the bottom of this last photo you can spot one of my current WIPs - "Dot Couture".


This is a quilt pattern by Julie at Jaybird Quilts.  She sells the pattern called "Dot Party", but the original version came out in Quilts and More Summer of 2010.  Yes, that's how long I've had this project queued up!  I bought an Urban Couture (Basic Grey) Layer Cake for the quilt, and then this plan just hybernated for well over a year.  When I reorganized my crafty zone, this was one of the several planned projects I unearthed. I've been trying so hard not to buy more fabric until I use up some of the stash I have - especially the fabric stash that was meant for a specific project!  All the blocks are stitched for this top, so I need to lay them out and put them together. I don't have any backing or binding fabric picked out - that is one thing I'll need to buy if I don't have anything suitable already around.


The other WIP I have at the moment is a camera bag for my Pentax DSLR that I've had for several months and don't use nearly enough. I'm hoping a cool bag will encourage me to take it with me rather than leave it because I don't have a padded bag to carry it in.  But I'll have to show that project next time!

Link me up!!  Go check out some awesome projects at these linky parties - and Happy Friday!


Friday, February 24, 2012

It's Friday...everybody say whoop whoop!

It is Friday - yay! I'm having a really full day today: early a.m. teleconferences, art docent volunteer at Wild Things classroom, more work work, catch up my blogs a little, 3 errands to run, lunch with a dear friend I haven't seen in ages, a mammogram (note to self: remember the advil!), Little league baseball practice, Boy Scout Pinewood Derby. I expect to be exhausted and ready for sleep after all this, but I like these kind of days where I am forced to juggle a bit to get everything accomplished.  Often I don't get it all done, but that's usually okay too.

Okay, my Friday Whoop Whoop linky project is this quilt for a brand new baby girl who I haven't gotten to meet yet!  I showed a little preview of this when I was still piecing it together - now it's quilted and bound, washed for the crinkles, and ready to go (though I may redo the label as you will see...)


The prints are from the Sherbet Pips line - most "modern" quilters will recognize this popular print - I've had these charm packs in my stash for a long time just waiting for the right project.  A couple of close shots:


I really love these little prints!  I used Kona Snow for the sashings, Kona Med. Gray for the binding, and a blue polka dot flannel backing. The quilting is simple diagonal lines shadowing the inside and outside of the patches.  I haven't done much straight line quilting (or any quilting as I'm still new to that part), but if you don't examine it too closely I think it looks pretty cool with the lines as opposed to an all over stipple.

My one disappointment is that the label bled a little in the wash.  I may decide to redo it - I used a black sharpie, but forgot to heat set it (I assume that will work, but if anyone knows it won't please let me know!). I may run down to Beverly's and look for a pen made specifically for fabric though.  This is my first actual label. I have (sometimes) stitched my initials and the year onto quilts, but I usually forget to do that even!


Nice to have a finish this week!

The other thing I did in the past couple of weeks was join the Craftsy BOM class (it's Free!) - each month there are two blocks to practice a new piecing method.

January was "slash" blocks: 
block #1
block #2
February was HSTs made two ways and then putting them together for different looks.  Piecing the small HSTs (3 inch finished) was more challenging than I expected, especially for the 2nd block which I think I will do over to get it right - the seams are not all lined up and I used scrap HSTs to replace the ones I botched first try - so the red HSTs are not with Kona Snow, but a cream color.  The first block came out a bit smaller than it was supposed to because my 1/4 in seams weren't "scant" enough, but I think it may still work.  If not I will have to do that one over. 
block #1
block #2
I am not using a FQ bundle of coordinated prints - I have to work on using up some more stash fabrics, and I think it doesn't matter so much for the more scrappy look of a sampler. I pulled a rainbow of fabrics and scraps to use. We'll see! I've never made a sampler quilt or BOM quilt, so I'm curious to see how I like it in the end.

I hope you all have a great weekend!
For more craft goodness, check out Sara's Whoop Whoop Linky party! (bonus this week - there's a giveaway too!)

And I found some other fun linkies, like TGEFF party at Quilter in the Gap !


And Sew and Tell Friday at Amylouwho:

Monday, February 20, 2012

Dragon Slayer!

Today was a school holiday of course, and Mr. Wonderful is a public servant, so he had the day off too. What could I do?  Even though I hadn't finished my presentation for 8am tomorrow morning, I took a vacation day to spend with the family.

We took BART into SF and visited the Children's Creativity Museum at Yerba Buena Gardens -it used to be called Zeum, but we'd never been there before.  There are several different studios and labs where kids of various ages can create, invent, build, record, compose, etc etc. It was pretty fun!  Teen Wonder and I made a claymation video - neither of us really knew what we were doing, so the video runs too fast to catch all the details. Watch it a few times so you can see the pool of blood, for example!

Note that the Dragon Slayer is a hot babe - Teen Wonder built her! Check out the insignia on her shield (my contribution)! See how the terrified villager comes back and kisses her feet!  You really do have to watch it more than once. Next time we do something like this we will definitely add some frames to pause and slow down the action more.

Viva La Dragon Slayer!

I have some other creative projects underway, but WIPs only, so I'll have to come back later in the week with some photos and updates.  Happy President's Day - I hope some of you had worthy adventures too!